How to Replace a Butterfly Valve Seat
Butterfly valves are valued for their simple design, quick operation, and low flow resistance. They play an important role as “pipeline switches” in water supply, chemical, and HVAC systems. At the center of their performance is the valve seat — the part that ensures a tight seal when the valve is closed, preventing leaks inside or outside the system.
Over time, the valve seat can wear out because of fluid flow, pressure changes, and chemical corrosion. As it ages, the sealing ability weakens. When a valve begins to leak, replacing the seat is often the most practical, efficient, and cost-saving solution to restore proper sealing.
Common Signs That the Butterfly Valve Seat Needs Replacement
Noticing early signs of seat wear helps prevent bigger problems and unexpected downtime. If your butterfly valve shows any of the following issues, it may be time to replace the seat.
|
Symptom |
Possible Cause |
Replacement Recommended |
|
Valve cannot close tightly, internal leakage occurs |
Seal aging or wear |
✅ Yes |
|
Operating torque increases noticeably |
Seat swelling or sticking |
✅ Yes |
|
Seat surface hardens, cracks, or peels off |
Material aging or chemical corrosion |
✅ Yes |
|
Minor leakage after long-term use |
EPDM/NBR has lost elasticity |
✅ Yes |
Types of Butterfly Valve Seats and Their Replacement Difficulty
Understanding the type of seat used in your butterfly valve is the first step to a successful replacement. Different seat designs require different maintenance methods, and the level of difficulty varies accordingly.
|
Seat Type |
Description |
Replacement Difficulty |
|
Replaceable Soft Seat |
A separate rubber ring (usually EPDM, NBR, or FKM) held in place by a retaining ring or groove. |
Low: Designed for easy maintenance and can usually be replaced directly without special tools. |
|
Bonded Seat |
The rubber layer is vulcanized or permanently bonded to the valve body or metal base. |
High: Typically cannot be replaced separately; the entire seat assembly or valve must be replaced. |
|
PTFE / Hard Seat |
Made of PTFE or metal materials, used in high-temperature or corrosive environments. |
Medium–High: Requires precise alignment and careful installation to ensure proper contact between the disc and seat. |

How to Replace a Butterfly Valve Seat (Example: Replaceable Soft Seat)
Following the correct steps is essential to ensure both safe operation and successful maintenance.
1. Safety Preparation
Completely shut down the system and isolate the valve. Use a pressure relief valve to release all pressure and remaining medium inside the pipeline. Never begin disassembly while pressure remains in the line.
2. Valve Removal
- Loosen and remove the connecting bolts, then take the butterfly valve out of the pipeline.
- For wafer-type valves, it may be possible to leave the body in place — simply remove the top-mounted actuator and related components to access the seat area.
3. Remove the Old Seat
Set the valve disc to a slightly open position.
- For retaining-ring designs, remove the screws that secure the ring.
- For groove-type designs, use a plastic pry tool or blunt-edge instrument to carefully lift and remove the old seat from the body groove without scratching the metal surface.
4. Thorough Cleaning
This step is critical.
- Use non-woven cloth and a suitable cleaning agent to remove all residue, rust, and debris from the valve body cavity, disc edge, and groove.
- Inspect the valve body and disc carefully for any deep scratches or corrosion that could affect sealing performance.
5. Install the New Seat
Verify that the new seat material and dimensions are correct.
- Apply a thin layer of silicone-based grease inside the clean groove to reduce friction during installation.
- Carefully insert the new seat into the groove, ensuring it is evenly seated, flat, and free of twists or bulges.
6. Reassembly and Testing
- Reassemble the valve in reverse order.
- After reinstalling it into the pipeline, conduct a pressure test: pressurize one side of the system while keeping the other side sealed.
- Check the valve in the closed position to confirm zero leakage and proper sealing performance.
Butterfly Valve Seat Material Selection Guide
Choosing the right seat material is essential to ensure long service life and reliable sealing performance.
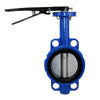
Union Valve offers a wide range of butterfly valves with replaceable seats designed to meet diverse operating conditions.
|
Material |
Key Features |
Typical Applications |
|
EPDM |
Excellent resistance to water, steam, ozone, and weathering. |
Water treatment, HVAC systems, power plant cooling water. |
|
NBR |
Good resistance to oil and abrasion. |
Petroleum products, fuel oil, natural gas. |
|
Viton (FKM) |
Outstanding resistance to high temperatures and chemicals. |
Chemical processing, pharmaceutical systems, corrosive media pipelines. |
|
Exceptional corrosion resistance, low friction, and high purity. |
Food and beverage industry, pharmaceutical production, strong acids/alkalis, seawater environments. |

Common Issues After Seat Replacement and How to Troubleshoot
Even with correct installation steps, minor issues may still occur. Don’t worry — here’s a quick troubleshooting guide to help you resolve them effectively.
Issue 1: Minor Leakage After Replacement
Check: Inspect the disc edge for wear or dents. Make sure the new seat is fully and evenly seated in the groove with no lifted or misaligned sections.
Issue 2: Excessive Operating Torque or Valve Sticking
Check: Examine the stem O-rings for damage or improper installation. Verify that the seat size is an exact match and the disc is properly aligned with the seat. Apply a light, compatible lubricant if needed.
Issue 3: New Seat Extrudes or Gets Damaged Under Pressure
Check: This often indicates a size mismatch or damaged groove in the valve body. Confirm that the seat has been installed in the correct direction, as some designs have a specific orientation.
Regularly inspecting the valve seat, selecting the right material for your service conditions, and following a proper installation process are essential to ensure long-term sealing performance and stable operation.
A professional seat replacement not only fixes current leakage issues but also enhances the reliability and safety of the entire system.
If you’re looking for high-quality butterfly valves with replaceable seats or need a customized sealing solution for specific operating conditions, contact Union Valve. Our experienced technical team is ready to provide complete support — from material selection to installation guidance.
FAQ — Common Questions About Butterfly Valve Seat Replacement
Q1: How often should a butterfly valve seat be replaced?
A: There is no fixed replacement interval. The service life depends on factors such as operating frequency, medium properties, temperature, pressure, and the number of cycles. As a rule of thumb, it’s recommended to perform a routine inspection at least once a year to assess seat condition.
Q2: Can I replace only the valve seat without changing the entire valve?
A: Yes — if your valve is designed with a replaceable soft seat, you can replace the seat alone, which saves both cost and maintenance time.
However, for bonded seat designs or valves with damaged bodies, it’s best to replace the entire valve assembly to ensure proper sealing performance.
Q3: How can I tell if my butterfly valve has a replaceable seat design?
A: The most accurate way is to check the product manual or contact the original manufacturer.
As a quick indicator, if the valve body features a retaining ring and screws, it is typically a replaceable soft-seat type.

