
Avoid These 5 Installation Errors for Lugged Butterfly Valves
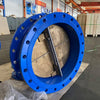
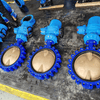
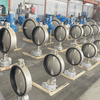
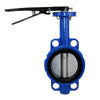
Lug type butterfly valves are widely used in water systems such as water treatment plants, municipal water supply, building water supply and drainage, and industrial cooling water due to their compact structure, rapid opening and closing, cost-effectiveness, and relative ease of installation.
However, ‘easy to install’ does not mean that it can be taken lightly. Wrong installation methods can seriously affect the performance, sealing and service life of the valve, and even lead to system leakage, failure, bringing expensive maintenance costs and potential safety risks.
As experts in the field of water system valves, Union Valve understands the importance of proper installation. This article will reveal the 5 most common mistakes made when installing lug type butterfly valves in water systems, helping you to ensure that the valves perform at their optimum level and guarantee the long-term stable operation of your system.

Mistake 1: Over-tightening the mounting bolts (exceeding the recommended torque)
This is one of the most common mistakes. Many people mistakenly believe that the tighter the bolts are tightened, the better the seal will be. However, the valve body (especially the seat area) of a lug butterfly valve is usually made of cast iron, ductile iron or plastic (e.g. UPVC), which has limited strength and toughness.
Possible Consequences:
- Valve Body Deformation/Cracking: Excessive torque can deform the flange area of the valve body or even cause cracking, resulting in permanent damage.
- Plate jamming or difficult operation: Deformation of the valve body can squeeze the internal valve plate and seat, preventing the valve from opening/closing fully or requiring unusually high forces to operate the handle/actuator.
- Seal Failure: Deformation can disrupt uniform contact between the valve plate and resilient seat, resulting in leakage.
- Damage to Seats: Excessive pressure can crush or permanently deform resilient seats (e.g. EPDM, NBR).
How to avoid:
Strictly follow the manufacturer's torque specifications! Recommended torque values for bolts of different body materials, diameters and pressure ratings are specified in the installation instructions (usually referenced to ANSI or DIN standards). Always consult and use them.
Use a torque spanner: Do not tighten by feel; use a calibrated torque spanner for precise control.
Cross symmetrical tightening: Tighten the bolts evenly in 2 or 3 steps in a diagonal cross sequence to ensure that the flanges are subjected to an even force.
Mistake 2: Failure to Clean Pipe Flanges or Damage to Seat Seals
Foreign matter such as weld slag, rust, sealant fragments, dirt, oil, etc. may remain on the sealing surface of the pipe flanges prior to installation of the valve, or may have accidentally scratched the valve's soft seat (usually located inside the body or at the edge of the valve plate) during handling or installation.
Possible Consequences:
- Flange Face Leakage: Foreign matter or uneven surfaces can prevent an effective seal between the flange gasket (if present) or the flange face of the valve body and the flange face of the pipeline, resulting in external leakage.
- Seat Damage Leakage: Scratched or oiled seats will not seal effectively against the valve plate, resulting in internal leakage (valve will not close tightly).
- Shortened valve life: Contaminants can accelerate seat wear.
How to avoid:
Thorough cleaning: Before installation, be sure to carefully clean the sealing surfaces of the pipe flanges, removing all foreign matter, burrs, oxidation and oil. Make sure the surface is smooth and even.
Protect the seat: Keep the valve plate partially open (approximately 45 degrees) until the valve is installed in position to avoid accidental scratching of the exposed seat. Be careful when installing bolts.
Check gaskets: If flange gaskets are used (although lug type butterfly valves do not normally require gaskets), make sure they are clean, intact and of the correct type.

Mistake 3: Forced installation without piping alignment
The centre distance of the bolt holes in the pipe flanges or the parallelism of the flange faces are off, and the installer forces the valve and pipe together with the bolts.
Possible consequences:
- Unusual stresses applied: The valve flange and pipe flange are subjected to enormous bending stresses.
- Leakage: The flange faces do not fit evenly, which inevitably leads to external leakage.
- Damage to the valve: Long-term stress can cause deformation, cracking, or even seizure of the valve body, valve stem, or valve plate.
- Bolt failure: Bolts are subjected to abnormal shear forces and are prone to breakage.
How to avoid:
Accurate Measurement and Adjustment: Check the alignment and parallelism of pipe flanges with straightedge, clearance gauge and other tools before installation.
Correct piping deviations: Make flanges naturally parallel and bolt holes square by adjusting piping supports, using flexible joints (e.g., rubber fittings), or cutting and correcting the piping if necessary.
Free Threading Bolts: All mounting bolts should be able to pass easily through all flange holes by hand, which is the basic judgement of alignment.

Mistake 4: Ignoring Flow Direction Markings (Installing in the Wrong Direction)
Not all lug type butterfly valves seal in both directions. Many are designed to seal in one direction (especially high performance or double/triple eccentric butterfly valves) and have seats that provide superior performance and life in a particular flow direction. An arrow (→) is usually cast or marked on the valve body to indicate the recommended flow direction.
Possible Consequences:
- Seal Failure (Internal Leakage): Check valves may not seal effectively, or may seal less effectively, under reverse pressure.
- Reduced seat life: Fluid washing over the seat in the opposite direction can accelerate wear or damage.
- Increased operating torque: Some configurations may require more effort to operate in the reverse direction.
How to avoid:
Check Body Markings Carefully: Always locate the flow direction arrow markings on the valve body before installation.
Follow the manufacturer's instructions: Follow the flow direction requirements in the instructions exactly. For water systems, the flow direction is usually required to be the same as the arrow, i.e., the media pressure is applied on the ‘back stem side’ of the valve when the valve plate is closed (the valve plate is facing the media).
Consultation in case of uncertainty: If the valve is not clearly labelled or the instructions are not clear, always check with the supplier or manufacturer.
Mistake 5: Ignoring expansion joints or system stresses (rigid installation)
Installing the valve as a rigid connector directly between long straight pipe sections or fixed points does not take into account factors such as piping thermal expansion and contraction, vibration, or foundation settlement. The lugs of a lug-type butterfly valve transfer stresses directly to the valve body.
Possible Consequences:
- Additional Stress on Valve: Forces from pipe expansion/contraction or vibration are applied directly to the valve body and may far exceed its design capacity.
- Flange leakage or body damage: Continued stress can lead to leakage at the flange connection or even breakage of the valve body or stem.
- Seat seal failure: Stress deformation can affect the concentricity of the valve plate and seat, leading to internal leakage.
How to avoid:
Reasonable design of piping system: Install expansion joints, flexible rubber joints or set
spring support hangers at appropriate locations upstream and downstream of the valve to absorb thermal displacement, vibration and settlement stress.
Avoid using the valve as a rigid support point: Ensure that the valve is not tasked with supporting or restraining the pipeline, so that it is only subject to internal media pressure.
Consider water hammer protection: For systems that may generate water hammer, install slow-closing check valves, water hammer arrestors, etc., to prevent damage to valves from instantaneous high-pressure shocks.

Lugged butterfly valves are a reliable and economical choice for water systems, but their performance and service life depend heavily on proper installation. Avoiding the five common mistakes listed above - over-tightening bolts, failing to clean the pipework/damaging the valve seat, forcing the pipework out of alignment, ignoring flow direction markings, and ignoring expansion joints/system stresses - is the key to ensuring long, trouble-free operation of the valve.
Always keep in mind that careful reading and strict adherence to the installation instructions provided by the manufacturer is the first step to a successful installation. When you need high-quality lug butterfly valves and expert technical support, Union Valve is ready to provide trusted solutions for your water system projects.
If you have any further questions, please contact us.