Step-by-Step Guide to Perfect Butterfly Valve Installation
As a key regulating device in fluid systems, butterfly valves are primarily used to cut off and throttle the flow within pipelines. To ensure that the valve operates correctly and performs optimally after installation, this article will focus on three aspects: properly handling the orientation and placement of the piping and valve, and ensuring compatibility between the valve and flanges. By addressing these areas, we aim to help installers avoid common mistakes and ensure that the valve is installed correctly and functions smoothly under various operating conditions.
Installation Considerations- Piping and Valve Orientation and Placement,and Flanged Compatibilities
During the butterfly valve installation process, it is essential to consider both the orientation and placement of the piping and valve, as well as the compatibility between the valve and flanges. This will help avoid operational difficulties, performance degradation, poor sealing, or mechanical damage that could affect the proper functioning of the valve. Union valves are carefully designed to ensure that, when fully open, the critical dimensions of the valve disc avoid interference with the internal diameter of most types of piping, including Schedule 40 pipes, lined pipes, and heavy-wall pipes.
Next, before we proceed with the installation, it is crucial that we confirm the details of the metal flanges, valve positioning, and valve orientation. These factors are vital to ensuring the correct and smooth installation of the butterfly valve.
Flanged Compatibilities
Resilient seated butterfly valves work well with all types of flanges, including those that meet ASME and AWWA standards, whether the flanges are flat-faced or not. For the valve to perform at its best, it's important to align it correctly between the flanges. Additionally, the flange bolts should be evenly tightened around the valve to ensure the molded o-ring on the seat face is consistently compressed, which is essential for creating a proper seal.
Butterfly Valve Installation Position
a. Installation Distance: Resilient seated butterfly valves should ideally be installed at least 6 pipe diameters away from other line elements, such as elbows, pumps, and valves. While maintaining this distance is not always feasible, it is important to maximize the spacing as much as possible.
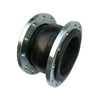
b. Connection Requirements: When connecting a resilient seated butterfly valve to a check valve or pump, an expansion joint should be installed between them to prevent the valve disc from interfering with adjacent equipment.
Butterfly Valveinstallation Orientation
In general, we recommend installing resilient seated valves with the stem in a vertical position, with the actuator located directly above the valve. However, for media such as slurries, mine tailings, pulp stock, dry cement, or any material containing sediment or particles, we recommend installing the valve in a horizontal position to ensure that the lower edge of the disc opens downstream.

Butterfly Valve Installation Method Statement
Once we have confirmed all the necessary details regarding the metal flanges, valve positioning, and valve orientation, the next step is to proceed with the correct installation of the butterfly valve. Proper installation is critical to ensuring the valve functions effectively and avoids any potential issues. Let's walk through the key steps and best practices for a smooth and successful installation.
Insert Resilient Seated Butterfly Valve Between Flanges
When installing a resilient seated butterfly valve, it’s important to properly spread and align the pipes. If the pipes aren't aligned and the valve disc is opened too far, the disc edge can get damaged when it hits the pipe flange. To prevent this, make sure the pipes are correctly spaced and aligned before you rotate the disc. This helps avoid any unwanted pressure during the first opening or closing and keeps the disc edge safe. Always double-check that the pipes are properly positioned before opening the disc to prevent damage.


- Caution: If the pipes are not spread apart, the disc edge may become damaged when it contacts the pipe flange.
Initial Centering & Flanging of Valve
To avoid problems during installation, make sure the valve disc is not in a closed position when centering and flanging. Avoid using gaskets at this stage, as they can distort and over-compress the seat, causing high torque when unseating the valve for the first time. Instead, tighten the bolts just enough to hold things in place, but not fully, ensuring that the disc edge is aligned within the valve body without being completely closed. This approach helps prevent damage to the disc edge and ensures a proper seal.


Final Aligning & Tightening of Flange Bolts
Ensure the piping is properly aligned before fully tightening the flange bolts. Misaligned piping can cause the disc’s outer edge to strike the pipe's inner diameter, leading to disc damage, increased torque, and potential leakage. Once the piping is correctly aligned, tighten the bolts with the disc in the fully open position. This will ensure that the disc clears the adjacent pipe and the seat face seals properly without causing excessive initial torque.


Installation Instructions:
- Position the Valve: When inserting the resilient seated butterfly valve between the flanges, place it centrally and loosely insert all flange bolts.
- Check Disc Clearance: Carefully open the valve disc to the fully open position to ensure it does not contact the inside of the adjacent pipe.
- Tighten Flange Bolts: Gradually remove all jack bolts or flange spreaders, and hand-tighten the flange bolts.
- Slowly Close the Disc: Slowly close the valve disc, checking for adequate clearance between the disc edge and the pipe flange.
- Final Bolt Tightening: Fully reopen the valve disc, then tighten all flange bolts to the specified torque.
- Final Check: Perform a complete rotation from fully closed to fully open to ensure the disc moves freely and without obstruction.
Conclusion
These are the key steps for installing a butterfly valve. By following these guidelines and steps, you can effectively minimize issues such as operational difficulties, poor sealing, and mechanical damage caused by improper installation, thereby ensuring the overall stability and safety of the system. If you have any questions while reading this article, please feel free to leave a comment.
If you need a quote for butterfly valves, don't hesitate to contact us!
Related Article:
- Understanding Your Options: Soft Sealing vs Hard Sealing Butterfly
- Understanding Butterfly Valve Seats: The Differences Between Hard, Soft and Rubber Lined
- What is Cv? A Guide to Valve Flow Coefficient Explained
- Recommend the Top ten Butterfly Valve Manufacturers With the Best Quality in China
- Essential Butterfly Valve Knowledge: Do You Know All of These?

-
Posted in
Butterfly valve installation, Butterfly Valve Installation Method Statement, Butterfly Valve Installation Position, Butterfly Valveinstallation Orientation

