
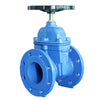
How to Install a Gate Valve in Water Pipeline
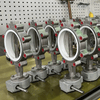
Gate valves are key isolation valves widely used in municipal water supply, fire protection, and industrial pipeline systems. Because many gate valves are installed in underground pipelines or locations that are difficult to access, any failure may require excavation or system shutdown for repair. This can not only disrupt normal system operation but also result in significant maintenance costs.
In many engineering projects, gate valve failures are not caused by product quality issues, but by improper installation. Problems such as pipeline stress, misalignment, or operation beyond the design pressure can all directly affect sealing performance and service life.
This article introduces the preparation work before installation, the standard installation steps, and the key points that should be considered during the installation process to help ensure safe and dependable valve performance in pipeline systems.

Preparation Before Installation
Before installing a gate valve, the valve and the pipeline system should be properly inspected and prepared to avoid potential issues during installation or operation.
-
Verify valve specifications:
Check the valve size, pressure rating, connection standard, and material to ensure they meet the design requirements of the pipeline system. -
Inspect the valve condition:
Confirm that the valve has not been damaged during transportation. Pay attention to possible issues such as a bent stem, damaged handwheel, scratched sealing surfaces, or loose bolts. Any abnormalities should be addressed before installation. -
Clean the pipeline interior:
Remove welding slag, dust, and other debris from inside the pipeline. If these impurities enter the valve, they may damage the sealing surfaces or affect normal valve operation.
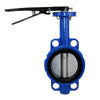
Gate Valve Installation Steps
After completing the inspection and preparation work, the gate valve can be installed according to the following steps.
1. Align the pipeline flanges
- Before installing the gate valve, ensure the pipeline flanges are properly aligned. The valve should not be forced into position or used to correct pipeline misalignment. If necessary, adjust the pipeline or supports first to ensure stress-free installation.
2. Install the Gasket
- Place an appropriate sealing gasket between the valve flange and the pipeline flange to ensure a reliable seal at the connection.
3. Install and Tighten the Flange Bolts
- After inserting the bolts into the flange holes, tighten them gradually in a diagonal cross pattern to ensure even load on the flange and reduce the risk of leakage or deformation.
4. Avoid Heat Impact from Welding
- If flange welding is required, install the valve only after welding is completed and the pipe has cooled. Welding with the valve installed may damage the internal sealing materials or rubber seat due to high temperature.
5. Check Valve Operation
After installation, perform a full open and close operation to confirm that the valve functions properly. Check that:
- The handwheel rotates smoothly
- The valve stem moves normally
- The valve can fully open and fully close
6. Check All Fastened Connections
Before pressurizing the system, inspect all bolted connections in pressure-bearing areas, including:
- Bonnet bolts
- Packing gland bolts
- Flange connection bolts
Ensure that all connections are securely tightened to prevent leakage during operation.

Recommended Installation Orientation
Gate valves can be installed in either horizontal or vertical pipelines, but it is generally recommended to install them with the valve stem in a vertical upward position.
This installation orientation helps to:
- Improve the convenience of valve operation
- Reduce wear on the valve stem and packing
- Enhance the stability of the internal valve structure
In certain special situations, the valve may also be installed at an inclined angle, but inverted installation is generally not recommended.
In addition, sufficient space should be reserved during installation to allow for future operation, maintenance, and inspection.
Considerations for Underground Pipeline Installation
In municipal water supply or water treatment systems, gate valves are often installed in underground pipelines. In such cases, the following points should be carefully considered.
1. Valve chamber installation
A valve chamber (Valve Chamber) or valve box (Valve Box) should be installed above the valve, and it should be located in a position that allows convenient access for operation and maintenance. The design of the valve box should avoid transferring external loads—such as vehicle loads—directly onto the valve, as this could place additional stress on the valve body.

2. Foundation Stability
The valve should be installed on a stable foundation to prevent stresses on the pipeline connections caused by ground settlement.
3. Operation of Deeply Buried Valves
For valves installed in deep trenches or underground pipelines, an extended stem or operating extension rod can be used to allow operation from ground level.
Common Installation Mistakes
The following mistakes may significantly reduce the service life of a gate valve and should be avoided:
|
Incorrect Practice |
Correct Practice |
|
Using the valve as a pipe support or anchor point |
The valve must remain free from pipeline stress |
|
Using a gate valve for flow regulation |
Gate valves are designed for fully open or fully closed operation; long-term partial opening can damage the sealing surfaces |
|
Operating above the rated pressure |
The valve should not be installed in systems where the working pressure exceeds the rated pressure |
|
No freeze protection in low-temperature environments |
Insulation or heat tracing should be used to prevent freezing |

Post-Installation Testing
- After the valve installation is completed, the pipeline system should undergo a pressure test to confirm that there are no leaks at the valve or pipeline connections.
- For buried pipeline systems, it is generally recommended to complete the pressure test before backfilling. This helps avoid the need for excavation again if a leak is discovered later.
- Pressure testing allows potential issues to be identified early, improving the overall reliability of system operation.
Maintenance Recommendations
If a gate valve is installed according to standard procedures, it typically does not require frequent maintenance. However, periodic inspection is recommended to ensure the valve remains in good operating condition.
Inspection items may include:
- Checking whether the valve stem packing shows any signs of leakage
- Verifying that the flange gasket remains properly sealed
- Confirming that bolt connections are secure
If necessary, bolts can be re-tightened to compensate for gasket compression that may occur during long-term operation.
Proper gate valve installation is not only related to the service life of the valve itself, but also directly affects the safety and stability of the entire pipeline system. By following standard installation procedures, adopting a proper installation orientation, and avoiding common installation mistakes, operational risks can be significantly reduced while long-term maintenance costs are minimized.
Union Valve focuses on the design and manufacture of valves for water systems, with products widely used in municipal water supply, wastewater treatment, HVAC, and industrial pipeline systems. If you are selecting gate valves for a project or require further technical support, you are welcome to contact Union Valve to learn more about our solutions.
Related Articles:
- Sluice Valve vs Gate Valve: What’s the Difference
- Why Use Extended Stem Valves in Complex Installations
- How to Choose Between Flanged and Socket Weld Gate Valves for Industrial Pipelines
- Why Gate Valves Leak and How to Fix It
- Characteristics of Resilient Seated Gate Valve and Their Differences from Metal Sealing Gate Valves


-
Posted in
Gate Valve, Valve Installation, Water System